 I took a short break from blogging to recover after a very busy week last week. As some of you know, I am LDS and am currently serving as 1st Counselor in our Stake Primary Presidency and last Saturday was our Stake Leadership Training Meeting. I felt like we had a lot of material to cover in the time given to us and with several new Primary presidencies in our stake, we were hoping to answer a lot of questions they might have. While our Stake President wanted us to keep things simple, we also felt a need to spruce things up a bit as we wanted to help make it worth their while (several had to sacrifice a couple hours travel time to come, others sacrificed the chance to go to Time Out for Women which was unfortunately scheduled the same day) and also we wanted our efforts to reflect how we view our (and their) callings and responsibilities. Also we noticed some sisters throwing away our handouts on their way out the door at our last meeting... so we needed to put a little more effort into our presentation apparently.
We decided to center our meeting around the theme Behold the Children with a spiritual thought from an article written by M. Russell Ballard entitled "Great Shall Be the Peace of Thy Children" (Ensign, Apr. 1994). First off, if you serve the Primary (namely bishopric members) or serve in the Primary (especially teachers), I highly recommend that you read this article. I'd even recommend it all parents as much of this can be applied in the home. This article was perfect as the title shared the General Primary Theme (from 3 Nephi 22:13) and it targets several areas in which we all can improve in.

Well so as you can see from these pictures, I made a folder for each sister and while it was a lot of work I am very glad we did it. We were able to fit all of our paperwork in there and get it organized for ease in later use. I purchased inexpensive folders from Staples (Red, Blue, Yellow... Primary colors obviously) and did a little digital scrapbooking magic using Jessica Sprague's Echoes of Asia free kit (I know I've used this a lot but I love it and it was the only freebie that coordinated primary colors so nicely). I made a small card/magnet with our contact info and slipped it into the card slot in the front folder pocket. I wanted to have folder tabs to organize the material but they would have been way too costly even at the back-to-school sales and so I figured I would make my own. I just used cardstock for the page itself and printed out rectangles (digiscrapped up of course) with the file's information typed up neatly in text boxes. I did a repeat on both sides (so you can read the tab info from the back of the folder too) and glued the tabs onto the cardstock. Not only was it cheaper but it was very cute and coordinated so high fives all around.

I don't want to overly focus on the making of the folder although the contents are a bit lengthy for a post. I will say that most of the material was building upon what is already in the Church Handbook of Instruction and that should always be the first place to turn to when you have a question about how to do your calling the way the Lord would have you do it. We literally do a handbook highlight at each of our presidency meetings and I think if people were to really study it they would find that most of what they need is right there. Of course we also included updated info from lds.org, info/help from outside sources, and then any tidbits we have come to feel strongly about as a stake presidency. It was a lot of info and sometimes it might seem like we are critical of the units when we present this info but really, serving in the Primary is a lot bigger calling than many realize and we need the support and guidance from the Lord, and our general and stake church leaders to make sure we are ultimately doing what is best for the children to help them grow in the gospel. I am so amazed at how each Primary can function so well with such great responsibility - if you think about it, they are addressing audiences from ages 18months to 12 years old, having to become familiar with things that may be intimadating to them, such as music, scouting, Faith in God, activities, sacrament presentations, etc., and that is not even half of it. I truly appreciate those who serve the Primary children and I'm so grateful for my chance to be a part of it all. I love gathering ideas from all the different units and I just went to my first Children's Sacrament Meeting Program for 2008 and it was wonderful! Sure I could sit and tell you about all the funny things that went on but I will just say that I can never attend a CSMP without tearing up at least once because of the Spirit that is felt when I listen to these kids speak and sing out their little testimonies. I love it all!
*Pencil drawing at top Jesus and the Little Children by Frances Hook



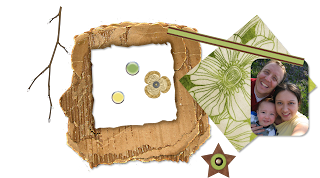 Once in Power point, you can adjust the order of layers, rotate the image, crop, resize, recolor, change shape, etc. You can add text, even
 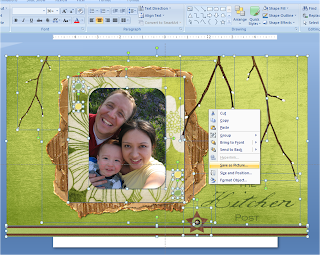 This can be done for both the header
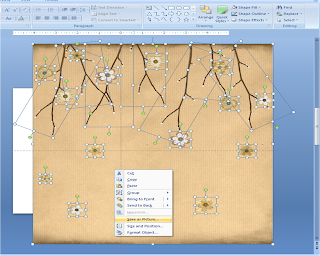 and the background image (explanations are coming, keep reading). Just a note, if you save and edit and save and edit a lot, you would be best to just save it under a different name. I find it confuses html a bit and it sure gives big headaches.
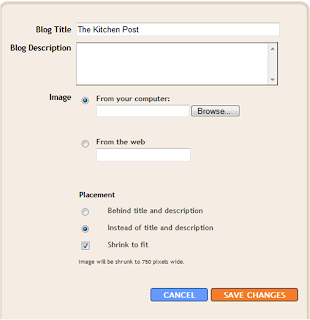 You will see this. Select to browse image from your computer and find the saved file you created in PowerPoint and saved as a jpeg, png, or gif. If you just want the image and nothing else, also select "Instead of title and description" under placement. When everything is uploaded and lookin' fine, save changes. Preview your blog to see if it is what you want. Easy peasy right?
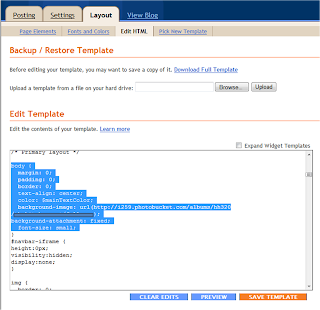 Here you will need to insert a code: