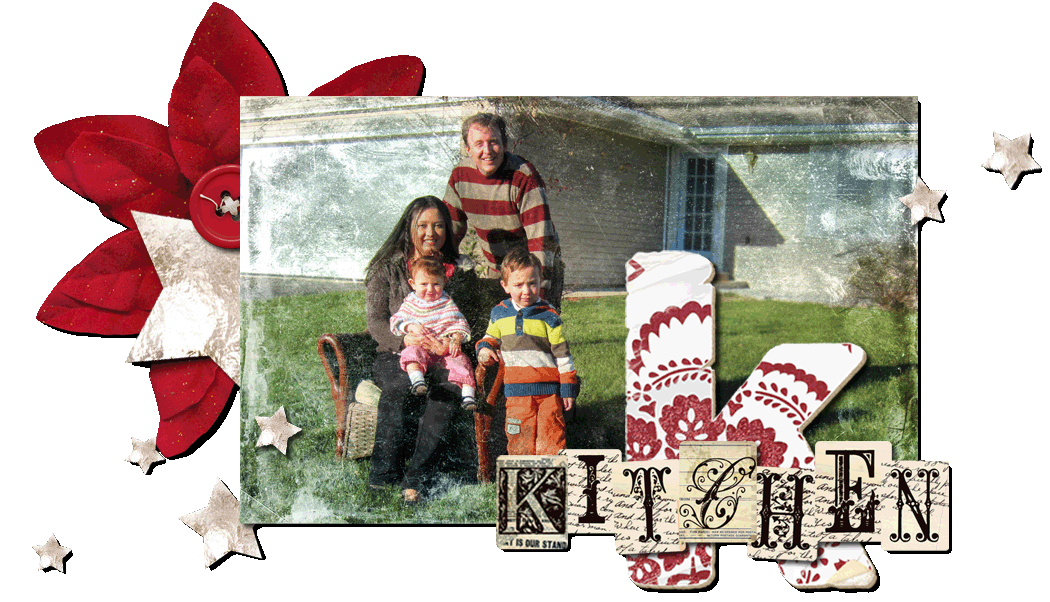
 So I've had a few people ask me how I dress up our blog and so rather than sending a number of lengthy emails, I thought I might attempt to make a post out of it in the hopes that you can understand it. I know there are places where you can upload a premade fancy layout but I am picky in what I want and how I want it so I do it myself. I will start off by saying that I am no computer wiz nor do I feel like I have massive amounts of creativity flowing from my fingertips - I feel more like a talent scout where I search out and collect ideas from others with more talent in these areas. I try, apply, and sometimes cry (as computer stuff can make me do) and now I will share.
I would first like to thank a good friend of mine, Lindsay, who was the first to utter the term "digital scrapbooking" into my email when I coveted her fancy blog. She then referred me to another website with tutorials on how to put together a digital scrapbook page. I quickly realized that I don't have the software that others are using and came to the conclusion that I just can't justify paying $80 plus for Adobe Photoshop Elements because I didn't think I would be a serious digi scrapper. After I finished fretting about the situation, I realized that I can do some basic work in Microsoft Powerpoint. (this is where you can applaud because I felt so brilliant coming to this realization all by myself...)
But then I figured I needed something to work with other than my pictures. I'm looking for freebies because, hey, I enjoy hobbies even more when it is inexpensive. So a quick search landed me two winner sites which I browse every chance I get - DigiFree and Scrapping With Ikea Goddess. Both are search engines for all free digi treats. I think I like the latter one a little better as they seem to weed out all the poor quality freebies but I've used both sites in the past. You can download entire kits (good for novices), paper packs, elements, etc. You may have to register to gain access to certain files. Unzip the files (winzip, or xp should do it) and you can click and drag or copy/paste individual pieces onto a PowerPoint page.
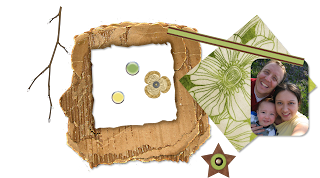 Once in Power point, you can adjust the order of layers, rotate the image, crop, resize, recolor, change shape, etc. You can add text, even fun fonts or use some alpha elements you get off the digi scrap sites. When you are all finished, select all, right click and save as a picture (jpeg, png, or gif).
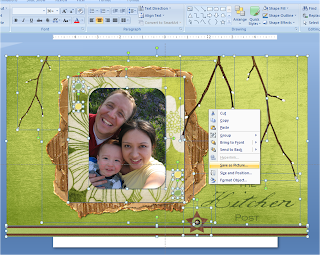 This can be done for both the header
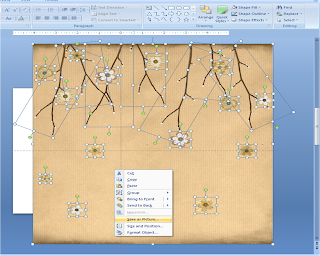 and the background image (explanations are coming, keep reading). Just a note, if you save and edit and save and edit a lot, you would be best to just save it under a different name. I find it confuses html a bit and it sure gives big headaches.
Creating these images is the fun part. Now here is the part that can bog you down...
Setting an image for blogger header:
Login to your dashboard -> Go to Layout -> Page Elements -> click to edit your header.
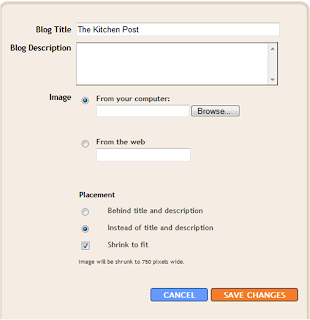 You will see this. Select to browse image from your computer and find the saved file you created in PowerPoint and saved as a jpeg, png, or gif. If you just want the image and nothing else, also select "Instead of title and description" under placement. When everything is uploaded and lookin' fine, save changes. Preview your blog to see if it is what you want. Easy peasy right?
Setting an image for blogger background:
Oh ouch. A few more steps here. You will need to do some editing in html for this one. First if your current blog template is one where there is no separation from the main body (where your posts are) and the background, you may want to switch to one with separates otherwise you will have your posts right on top of your image which will be hard to read. You will then need to upload your image to a free photo host. I use Photobucket. Upload your picture and copy the url or direct link.
In blogger, Login to your dashboard -> Layouts -> Edit HTML. You may want to backup your template before proceeding. In Edit Template scroll down until you get to the body { code which is near the top.
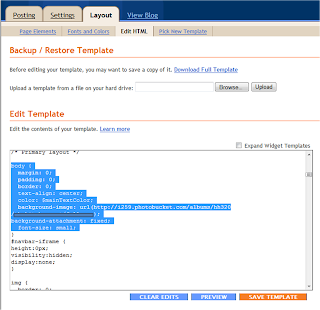 Here you will need to insert a code:
body {
background-image: url(URL address of your image);
and insert your url from your uploaded photo in place of URL address of your image. (I kind of covered mine for some privacy) You can then click the preview button to make sure it worked. Save if it meets your approval.
The background is automatically set to scroll down with the rest of the blog. If you are like me and want to have a static background to avoid a tiled background effect, insert this code:
background-attachment: fixed;
The background is automatically set to repeat the image both horizontally and vertically. If you are wanting to change any of these parameters or if you want to change the alignment, get the codes here. There is a lot more you can do so check it out if you are interested. Save everything you want to keep when you are done.
The background edges or seams that may appear will depend on how big your image file is so play around with size to get things the way you want it.
Other things you should know:
It is common curtesy to give credit to the creators of your digital scrapbooking materials. Sometimes they come close to demanding it. I've listed mine at the bottom of our blog.
You can put digital scrapping addons to the sidebar as well. Just create them and save as picture and Dashboard -> Layout -> Page Elements -> Add a page element to your sidebar -> Add picture and upload what you want.
Many digi scrap freebies are quick pages or basically premade layouts and I have found that I can't use them in PowerPoint. Too bad.
There are many other little things I could say here but basically, if you run into any problems, just let me know - you can reach me at thekitchenpost at gmail dot com. I hope this is helpful and doesn't deter you from trying it!
What else do you use Digital Scrapbooking for?
Well, I'm still feeling this one out. Yesterday I just made a mother's day card and printed it and I kind of liked that. No glue, no cutting. I've made family calendars for my grandma as Christmas gifts for the past handful of years and I am excited to do everything digitally this year as it will save me a lot of time and money. I just sent off a Mother's Day gift for my grandma (Grandma R this is where you don't read any further) and I ordered some playing cards where you can put a customized image on the back (register and they give you coupon codes). Grandma enjoys playing Pinnochle and since 2 full decks were cheaper than 1 Pinnochle deck, she will be getting some extra cards.
Fun things to think about!
*If any of you have a better way of doing all of this, PLEASE let me know!*


Oh.... I can't wait to give it a try!!!! Thanks Jack!
ReplyDeleteI have been wanting to ask you how to create your cool blog pages for a while now! Thanks for posting this, I am excited to give it a try!!
ReplyDeleteI'm excited to see what you come up with! Ladies let me know if you need help!
ReplyDeleteYay Jack-Schmack! I think your blog has FAR surpassed mine in cutness by now! I had no clue you could do all that in powerpoint! I'll have to refer all my friends photoshop-less to this AWESOME tutorial! Loves...
ReplyDeletep.s. When are you coming to visit again?
That last comment should read "cuteness"...which is a word I made up; however Webster will soon put it in his dictionary when he sees your blog! :)
ReplyDeleteWow, this is so awesome, Jackie. I just spent a couple of hours figuring this out and creating a new blog header for a new blog I've wanted to start (though when I'll find time to write it who knows!) Check my work at http://bloomingtree.blogspot.com/.
ReplyDeleteSydney - LOVE the bloomingtree layout! What a fun way to combine old and new art! I can't wait until you start posting too!
ReplyDeleteLinz - I don't think I'll be out for a visit until my remaining sibling decides to get married (probably by the end of the year though) And as far as "cuteness" goes, I always thought that word had a specific intonation that accompanied it and now I know why - it was from you! I can hear you now.... :)
Oooh, now I can try. I'm a bit scared, though . . .
ReplyDelete